Agentforce Blog
- November 27, 2025
Agentforce Implementation Guide for Startups: Step-by-Step to 24/7 AI Support
Startups grow fast, and so do customer questions. But hiring a large support team is expensive, slow, and difficult to manage. This is where Agentforce, Salesforce’s AI-powered support automation platform, becomes a game-changer.
Agentforce allows startups to offer 24/7 intelligent support, reduce workload on human agents, and deliver accurate answers instantly. When implemented correctly, it can improve customer satisfaction, reduce operational costs, and help your team focus on real business growth.
This guide walks you through the complete Agentforce implementation steps, written simply so founders, business owners, and non-technical teams can clearly understand the process.
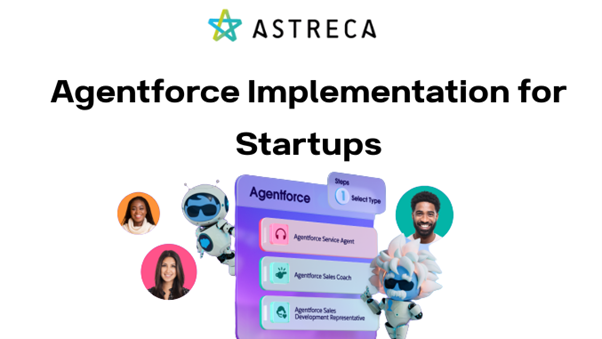
What Is Agentforce?
Agentforce is Salesforce’s new AI-powered support layer designed to automate responses, analyze customer intent, and route conversations to the right agent. It combines Salesforce data, AI models, messaging, and real-time routing.
Startups use Agentforce to:
- Reduce response time from minutes to seconds
- Offer support on WhatsApp, Web, SMS, and other channels
- Automate FAQs using Einstein AI
- Improve team efficiency with intelligent routing
- Scale support without increasing cost
Why Startups Should Implement Agentforce Early
- 24/7 availability without hiring more staff
- AI-driven accuracy and personalized responses
- Lower support cost compared to manual operations
- Instant scalability when customer volume increases
- Better customer satisfaction and faster issue resolution
If you’re a startup founder looking to streamline customer support, Agentforce gives you an enterprise-grade system from day one.
Complete Agentforce Implementation Steps
Below is a step-by-step breakdown of how Agentforce is implemented for startups. This includes both technical and business-friendly explanations.
1. Create a New Service Agent
Set up your support team member inside Salesforce Service Cloud.
This agent will be available in the routing system for chat and messaging support.
Internal Resource to Learn More:
https://astreca.com/services/salesforce-implementation/
2. Verify Permission Set
Assign required permission sets so the agent can access Service Cloud, Messaging, and Omni-Channel.
This ensures the agent can receive incoming chats.
- Agentforce Service Agent Object Access
Grants access to all core Agentforce objects required for handling AI-powered conversations and workflows.
- Agentforce Service Agent User
Enables full Agentforce functionality, allowing the user to operate as an AI-assisted service agent in Salesforce.
Provides permissions to create, edit, and manage AI prompt templates used by Agentforce.
Allows the user to access and use existing AI prompt templates without modifying them.
3. Enable Messaging
Enable Messaging from Setup to activate digital communication channels such as WhatsApp, SMS, Web Chat, Facebook Messenger, and In-App Messaging.
This step allows Salesforce to receive customer messages, create conversations, and route them to agents through Agentforce and Omni-Channel.
It also enables features like automated replies, AI-driven intent detection, and conversation tracking inside the Service Console.
4. Enable Routing Configuration
Routing determines which agent should receive each incoming conversation. Salesforce Omni-Channel uses routing rules to distribute chats based on agent skills, availability, priority, and workload capacity.
By enabling Routing Configuration, your support team receives messages in a structured, automated, and fair way — ensuring no conversation is missed and customers get faster responses.
Steps to Enable Routing Configuration
Go to Setup → search for Omni-Channel.
Enable Omni-Channel if not already active.
Navigate to Routing Configurations.
Click New and define:
Routing Priority (e.g., High, Medium, Low)
Units of Capacity each chat will consume
Routing Model (Least Active, Most Available, etc.)
5. Create Queue
Queues help organize and group incoming conversations based on type, department, or expertise.
By assigning conversations to the right queue, Omni-Channel can route them to the most suitable agent.
Common queues include: Pre-Sales, Support, Billing, Technical.
Steps
Go to Setup → search Queues.
Click New and enter the queue name (e.g., Support Queue).
Add members (agents) who should handle conversations for that queue.
Save and link the queue to your Routing Configuration.
6. Create Presence Status
Presence Status determines whether an agent is Available, Busy, Away, or Offline, allowing Omni-Channel to decide when to send them new conversations.
This ensures that only agents who are ready to work receive incoming chats.
Steps
- Go to Setup → search Presence Statuses.
- Click New and create statuses like Available for Chat, Break, or Offline.
- Assign each status to the appropriate Channels (e.g., Messaging).
7. Create Presence Status Permission Set
Purpose: Let agents switch and use presence statuses in Omni-Channel.
Steps
Setup → Permission Sets → New.
Name it (e.g., Presence Status Permission).
Under System Permissions, enable any Omni-Channel presence-related permissions (e.g., Use Omni-Channel / Switch Presence Status).
Save and assign to agent users.
8. Click Presence Configuration
Purpose: Let agents switch and use presence statuses in Omni-Channel.
Steps
Setup → Permission Sets → New.
Name it (e.g., Presence Status Permission).
Under System Permissions, enable any Omni-Channel presence-related permissions (e.g., Use Omni-Channel / Switch Presence Status).
Save and assign to agent users.
9. Create a Messaging Channel
Purpose: Enable a customer-facing channel (WhatsApp, Web Chat, SMS, etc.).
Steps
- Setup → Messaging → Messaging Channels → New.
- Choose channel type (Web Chat, WhatsApp, SMS, etc.) and fill required connection info.
- Configure settings (auto-responses, transcript logging).
- Activate the channel and test with a sample message.
10. Create Omni-Channel Routing Flow
Build a flow in Salesforce Flow Builder to control routing logic.
Example Flow Logic:
If message type = billing → send to Billing Queue
If high priority → send to senior agent
This ensures customers get the right help on the first try.
11. Update the Messaging Channel with the Routing Flow
Purpose: Ensure each incoming message uses your routing logic.
Steps
Setup → Messaging Channels → open the channel.
Under Routing / Advanced settings, select the Flow you built.
Save and test by sending messages matching different routing conditions.
12. Enable Digital Experiences
Purpose: Provide a portal where customers can chat, track cases, and access knowledge.
Steps
- Setup → Digital Experiences → Settings → enable Experience Cloud.
- Create a new site (Experience Builder) using a template (Customer Service or Help Center).
- Configure pages: Chat widget, Case list, Knowledge.
- Publish the site and note the site URL.
13. Create an Embedded Service Deployment
Purpose: Generate the chat widget/snippet to embed on your website.
Steps
- Setup → Embedded Service Deployments → New Deployment.
- Select Experience Site and Messaging Channel, configure branding and behavior.
- Save and copy the generated snippet.
- Add the snippet to your website’s HTML where you want the widget to appear.
14. Add Trusted URL
Purpose: Generate the chat widget/snippet to embed on your website.
Steps
Setup → Embedded Service Deployments → New Deployment.
Select Experience Site and Messaging Channel, configure branding and behavior.
Save and copy the generated snippet.
Add the snippet to your website’s HTML where you want the widget to appear.
15. Create an Experience Cloud Site
Build a branded customer portal for:
- Chat
- Self-service
- Ticket submission
- Knowledgebase search
16. Add CORS (Cross-Origin Resource Sharing)
Purpose: Allow your web app to make secure browser requests to Salesforce.
Steps
Setup → CORS → New.
Enter your site origin (e.g., https://yourstartup.com).
Save.
Test by opening your site and ensuring no CORS errors appear in the browser console when the widget loads.
17. Test Agentforce Agent in Experience Cloud
Finally, test everything:
- Chatbox working
- Routing flow working
- AI messages responding correctly
- Agent receiving chats
- WhatsApp or web chat connecting successfully
After testing, your Agentforce setup is ready to go live.
How Agentforce Boosts Startup Business Growth
- Higher customer retention
- Faster ticket resolution
- Lower support cost
- Automated replies reduce agent workload
- Instant scalability during campaigns or peak season
- Better customer insights through AI
A well-implemented Agentforce setup can save a startup thousands of rupees each month compared to building a large support team.
Why Choose Astreca for Agentforce Implementation
Astreca specializes in Salesforce implementation for growing businesses.
We help startups deploy Agentforce correctly—fast, secure, and customized.
Astreca Consulting is a Salesforce Select partner with extensive experience working with manufacturers. Contact us or call 732-310-2796
#Agentforce #AIAutomation #Astreca #BusinessAutomation #CustomerExperience #CustomerSupportAI #DigitalTransformation #SaaSStartups #Salesforce #SalesforceImplementation #StartupGrowth #StartupTools #TechForStartups